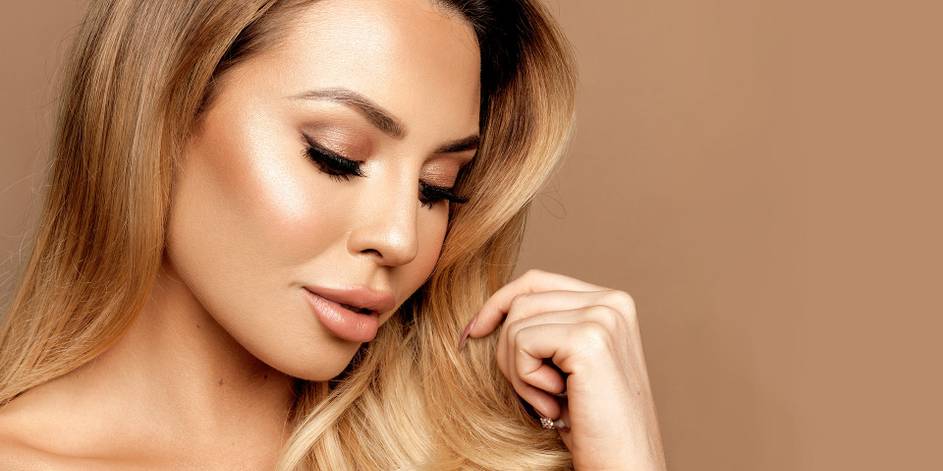
Here's where you should be applying highlighter
Highlighters are many people's most favorite products. They’re just so much fun and can give you glowing, radiant skin within just seconds. If used strategically, it creates a dimension to your face by bringing light to all its high points.
The high points of your face are the parts where the sun would naturally hit. These places are where you need to dust a little (who are we kidding? Lots!) highlighter using either a brush or a beauty blender. Trust us when we say that your makeup game will up notches higher once you master this trick.
Read on as we discuss the different parts of your face that you need to highlight the next time you’re doing your makeup.
The Arch of Your Eyebrows
Your brow game has to be strong always and there is no better way to achieve this than highlighting the arches. This will help to give your eyebrow more definition and make your eyes appear more awake. The end result will be accentuated eyes and a confident you.
Apply your highlighter above and below the outside half of your eyebrows. Gently pat the product into your skin with your ring finger to blend it properly. Remember to do this step after you have filled in your brows, otherwise you’ll end up with a brownish-grey smudge. You can also place a little product on the inner corners of your eyes to make your eyes pop.
The Bridge and Tip of Your Nose
You can use the highlighter to make your nose look more sculpted and angular. Use a brush to apply the highlighter on the bridge of your nose starting from the place just between your eyes till about a half-inch above your nose tip. Don’t forget an additional highlighter dot right at the tip of your nose to complete the look. A lot of people make the mistake of applying the highlighter in a straight line. This will actually defeat the purpose of defining your nose. While you're at it, use a darker colored concealer on the sides of your nose to make it look sleeker.
I’ll suggest that you opt for a small makeup brush with short bristles for this purpose. This will help you apply the highlighter more precisely and help you deposit more product on your nose.
The Entire Cheekbone Area
Coming to our favorite part: applying highlighter on our cheekbones for that extra pop. You can even layer on the product for a wet, dewy glow.
Draw the highlighter on your face in a “C” shape, starting from above your brows to your cheekbones. Use a clean brush to buff any harsh lines and bring out that pop. You can use a liquid or the newer jelly highlighter here for a more intense pop.
The Center of Your Forehead
Not a lot of people do this but highlighting the center of your forehead will create a more contoured version of your face. Especially when you’re using a bronzer on your temples.
Above Your Cupid’s Bow
Use the highlighter on the very top of your lips after you’ve applied lipstick to make your pout look fuller and more luscious. Beauty bloggers are also dotting the highlighter in the middle of their lips for a shiny effect. You can do this too if you want a more dramatic look.
The Center of Your Chin
Similar to the forehead, applying the highlighter on your chin can make your face appear more sleek and sculpted. You have to remember to not overdo the highlighting job here as you might risk looking too shiny, and not in a good way. Just a little dusting and you’ll be good to go.
The other places that you can use a highlighter are your collarbone, your legs, and your shoulders for an overall dewy look. With so many varieties of highlighters available on the market, it can be both amazing and intimidating. If you're a beginner, I'd suggest you opt for powder highlighters as they're really easy to use. But, if you want your highlighter to have that blinding pop (like me!) go for liquid or jelly highlighters. No matter which highlighter you purchase, you have to properly blend it to get a more natural-looking pop.
Resources— Refinery29, Loreal Paris USA
About The Author